


In this ‘how to’ we explain how you can open a Google Webmaster profile for your website and how you can connect it to SEO Effect.
‘Not provided’ is going to 100%. As a consequence, you will no longer know how unpaid traffic is reaching your website, and how you’re doing for certain keywords in terms of traffic, engagement and conversion. Thankfully there are a few solutions to this problem. We already discussed 6 solutions for ‘not provided’ in a previous post.
One of the solutions is importing data from WMT, which we have now built into SEO Effect. New: SEO Effect solution Not Provided.
To use this in SEO Effect, you need to do the following:
- Start a Webmaster Tools profile
- Connect WMT api for crawl errors to SEO Effect (method 1)
- Connect WMT Kliks for keyword data to SEO Effect (method 2)
Unfortunately Google’s WMT has a very limited API. To connect all the data in the right way, extra steps are necessary.
Why would I make the effort?
By connecting your Google Webmaster profile to your SEO Effect campaign, you can do 2 things:
- view WMT crawl errors in SEO Effect; combined with the (more up-to-date) errors our own crawler finds, this gives a good impression of all the pages Google has difficulty indexing.
- supplement data from WMT; SEO Effect converts the click data from WMT to visits.
Especially this second point is really important since Google doesn’t give search term information to any web statistics program.
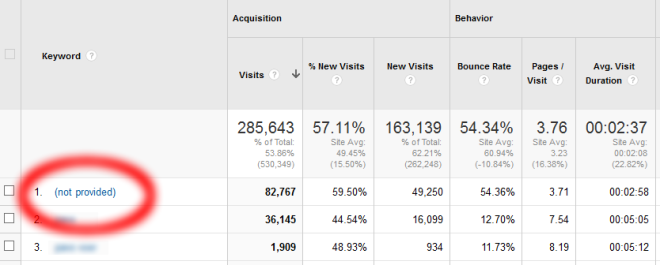

You can see that nearly all search terms are gone when you look at the source ‘organic search’. Instead an increasing percentage of ‘not provided’ is shown. These are all visits through Google, of which Google doesn’t provide the search term that the visitor used.
To be able to keep track of your website’s performance at the search term level anyway, you can use our solution for ‘not provided’.
- The organic search traffic to your website is shown exactly. We convert the click data in WMT to visits and save this for 2 years (in contrast with WMT, that only saves this information for 2 months, and shows clicks rather than visits.)
- SEO Effect calculates the maximum amount of extra traffic per search term in the right way for all your search terms.
- SEO Effect calculates the organic search performance in the right way for your website. Monitoring with the metric ‘traffic share’ is about the right data again, and isn’t weakened by the percentage ‘not provided’.
Starting a Google Webmaster Tools account
If you don’t have Google Webmaster Tools yet, you open an account first. Log in in your Google account and go to Google Webmaster Tools.
Suggestion: You can also directly click on the ‘create’ link in SEO Effect, for example:
https://www.google.com/webmasters/verification/verification?hl=en&siteUrl=http://nypost.com/ where, of course you replace ‘http://nypost.com/ with your own website URL.
Google will now decide what a fitting verification method is from within the Webmaster Tools.

Verify Google Webmaster Tools
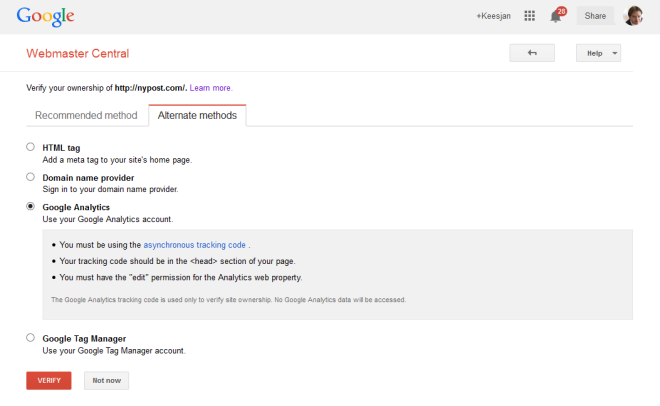
When you add a website or app to Google Webmaster Tools, you need to prove that you really own it. This can be done in several ways.
The easiest way to verify your website is through Google Analytics, which you probably use already.
There are 3 conditions to be met:
- You need to use the newest GA code or the latest async tracking code. This method has been common for 2 years now. In some time the universal analytics will be introduced and the async code is necessary for that anyway.
- Your tracking code must be in the <head> part of your page. This is necessary for good measurements in Google Analytics anyway, so also a no-brainer.
- You need to be administrator/manager in the Analytics account. This is really important. If you only have reading/analysing rights the Webmaster Tools verification won’t work.
The Google Analytics code will only be used by Google to verify the ownership of the website. Your Google Analytics data won’t be read.

Add Google Webmaster Tools to SEO Effect
There are 2 verification methods in SEO Effect:
- Give permission to load crawling errors etcetera from WMT into SEO Effect
- Give permission to read search terms and clicks
Unfortunately it’s currently not possible to connect everything with 1 method because Google isn’t that far yet. We advise you to make both connections.
Permission 1: access to crawling errors

- First open a Webmasters Tool profile for your website as described above.
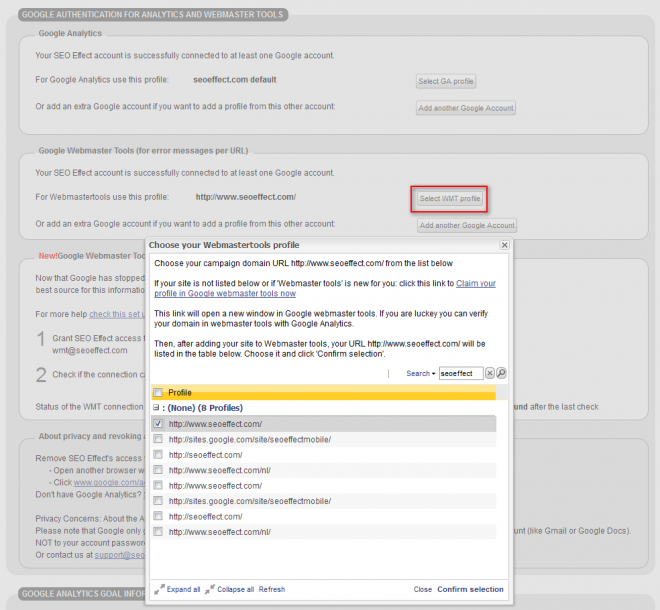
- Next, in SEO Effect choose ‘Add Google account’ when starting a new campaign or in ‘edit campaign’ for an existing campaign, if you hadn’t done this already for Google Analytics.
- Now choose ‘Select WMT profile’ and choose the profile that matches this particular campaign in SEO Effect.
- Click on ‘Confirm selection’.
- The Webmaster Tools API is now connected to SEO Effect and crawling errors can be imported.
Permission 2: access to search behaviour and clicks
By clicking the button ‘Give WMT access’ in SEO Effect you enter a Webmaster Tools screen to adjust the access rights of your website.
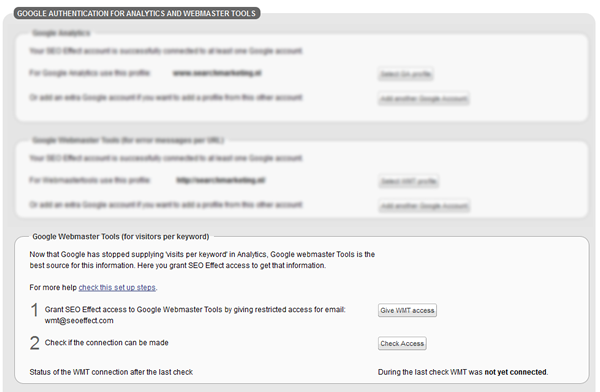

Follow these steps:

Each step explained
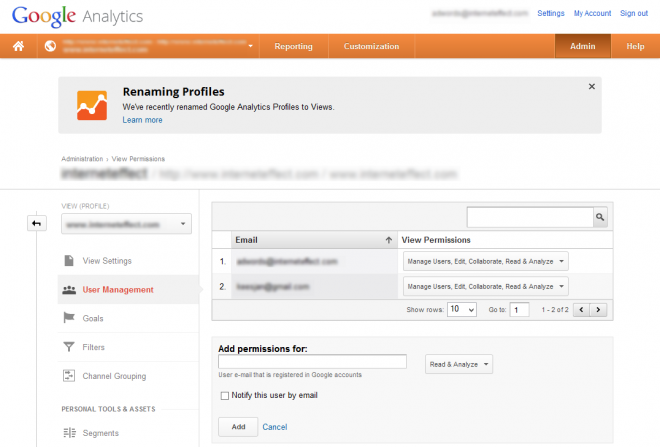
- Click on ‘Add a new user’
- Enter the e-mail address ‘wmt@seoeffect.com’ and 3 – set ‘rights’ to ‘limited’.
- Click on ‘add’ to add other e-mail addresses. Then go back to SEO Effect.
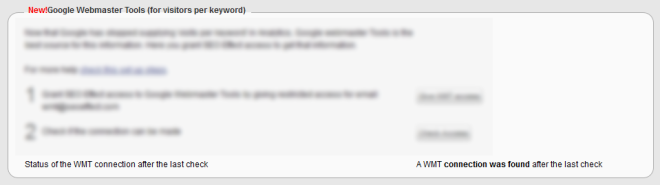
- Once you’re back in SEO Effect, check whether SEO Effect can actually get access by clicking the button ‘Check access’.
- Once SEO Effect has access, the WMT click data of the past months will be imported and edited for rendering.
- From now on SEO Effect will import and convert the data for your campaign every month.

This way you bring back the ‘not provided’ search terms!